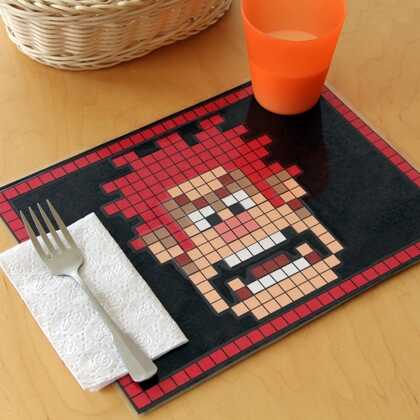
Tired of playing the villain, Wreck-It Ralph abandons his home game hoping to prove he can be helpful instead of destructive. This colorful placemat, featuring a pixilated portrait of the sensitive “bad guy,” illustrates just how handy he can be to have around.
Download Wreck-It Ralph Pixel Placemat Template
by Cindy Littlefield
What you'll need
- Template for Wreck-It Ralph Pixel Placemat
- Cardstock or heavy-weight craft paper (red, orange, white, and black)
- Scissors
- Colored markers or pencils
- Glue stick
- 2 self-adhesive laminating sheets (sold at office supply stores)
How to make it
1. Print the template, using red cardstock for the first page, orange cardstock for the second, and white cardstock for the third. Use colored markers or pencils to color in the pixels on page 3, as specified. (Note: Another option is to print all three pages on white cardstock and then have your child color the pixels on the first page red, and the pixels on the second page orange.) Cut out the pixel clusters.
2. Glue the red border pixels onto a sheet of black cardstock, creating a frame along the paper’s edge. Then glue the hair and the cheeks-and-ears pixel clusters in place, centering them on the placemat, as shown. Next, glue the forehead and chin pixels in place.
3. Add the eyebrows and teeth pixels, followed by the nose pixels.
4. Finally, glue the tan and then the reddish-brown shading pixels in place.
5. Seal the finished placemat between two self-adhesive laminating sheets, and it’s ready to use.
Crafts


